
 Pin
Pin
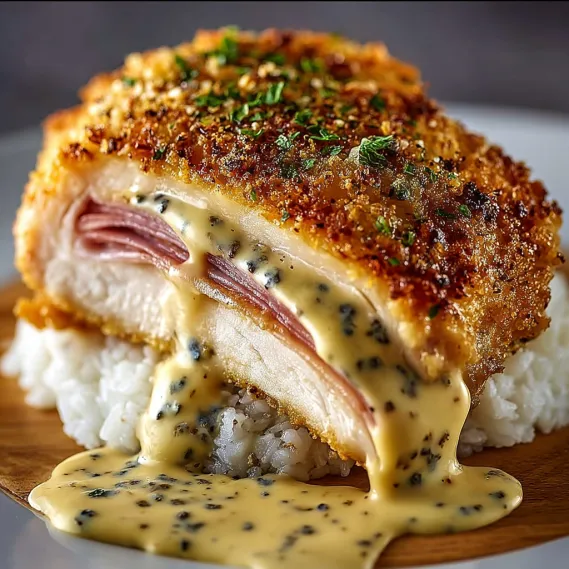
Thin chicken breasts enclose ham and Swiss before receiving a flour, egg and crumb coating. Roll first and dredge afterward so the flour stays on the exterior. Searing colors the crust; the oven finishes the chicken and enclosed filling.
Pound to an even thin layer, around one-quarter inch where practical, without tearing. A thick patch creates a thicker roll that needs longer in the oven. Work on a stable surface and keep raw poultry utensils separate.
Ingredient amounts and preparation
- Set out: 4 boneless, skinless chicken breasts (about 6 ounces each)
- Set out: 4 slices Swiss cheese; 4 slices cooked ham
- Set out: 1/2 cup all-purpose flour
- Set out: 1 teaspoon salt; 1/2 teaspoon black pepper
- Set out: 1/4 teaspoon garlic powder
- Set out: 2 large eggs; 1/4 cup milk
- Set out: 1 cup panko bread crumbs
- Set out: 1/4 cup grated Parmesan cheese; 1/4 cup olive oil
- Set out: 2 tablespoons butter
- Set out: Dijon mustard for spreading; Fresh parsley, chopped, for garnish
Cooking sequence and doneness
- Stage 1
- Heat the oven to 375°F.
- Stage 2
- Pound chicken to an even thin layer without tearing. Spread a thin layer of Dijon on each piece and add one ham and one Swiss slice.
- Stage 3
- Roll tightly, tuck edges and secure with counted toothpicks.
- Stage 4
- Mix flour, salt, pepper and garlic powder in one dish. Whisk eggs and milk in another and combine panko with Parmesan in a third.
- Stage 5
- Dredge each rolled parcel in flour, then egg, then crumbs.
- Stage 6
- Heat olive oil and butter in an oven-safe skillet over moderate heat. Brown the rolls on all sides without scorching the coating.
- Stage 7
- Transfer the skillet to the oven and bake about twenty to twenty-five minutes, longer if needed until chicken and enclosed centers reach 165°F.
- Stage 8
- Rest five to ten minutes. Remove every toothpick, slice and garnish with parsley.
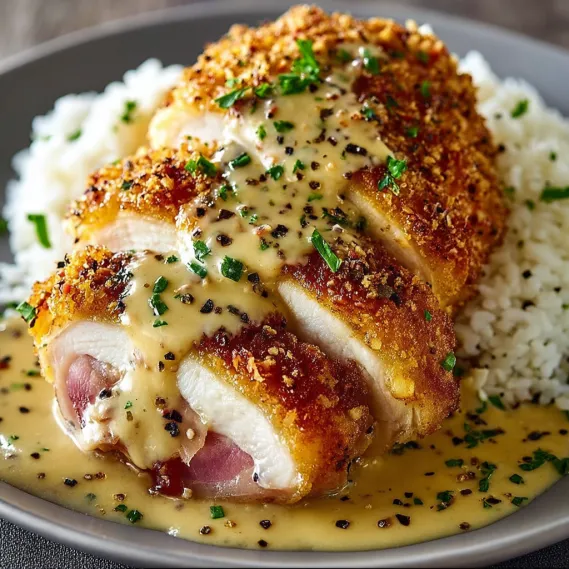
After the ham-and-cheese roll is formed and secured. Dredge the exterior in seasoned flour, then egg wash, then panko and Parmesan. This avoids flour being trapped inside the filling.
How are toothpicks handled?
Use them to hold seams and keep a count of how many enter each roll. Remove every one before slicing and serving. Do not assume cooking makes wooden picks safe to bite. Check 165°F through the thick chicken and the enclosed center. Avoid measuring only hot melted cheese or touching the skillet. Continue baking if any checked area is below that endpoint.
Why rest after baking?
A brief five-to-ten-minute rest helps molten cheese settle and makes slicing easier. The skillet handle remains hot after leaving the oven. Use mitts and keep it away from children or an unprotected hand.
Storage and serving later
Refrigerate perishable leftovers promptly in shallow containers at 40°F or below; do not wait for a large hot batch to cool completely on the counter. University of Illinois Extension’s leftover guidance gives a three-to-four-day refrigerated window and 165°F for reheating foods served hot. Keep cold salads and toppings chilled, and follow shorter product-label limits where applicable.
Related recipe choices
For another complete recipe, see Chicken Cordon Bleu Meatloaf or Chicken with Garlic Butter Noodles. Each has its own ingredient quantities and cooking sequence; keep those measurements separate when choosing a meal. USDA’s temperature guidance specifies 165°F for poultry, including ground chicken and turkey. Thermometer placement guidance explains checking the thick center rather than relying on surface color.
Common Questions About This Recipe
- How thin should chicken be?
Pound to an even thin layer, around one-quarter inch where practical, without tearing. A thick patch creates a thicker roll that needs longer in the oven.
- When does flour go on?
After the ham-and-cheese roll is formed and secured. Dredge the exterior in seasoned flour, then egg wash, then panko and Parmesan.
- How are toothpicks handled?
Use them to hold seams and keep a count of how many enter each roll. Remove every one before slicing and serving.
- Which temperature is required?
Check 165°F through the thick chicken and the enclosed center. Avoid measuring only hot melted cheese or touching the skillet.
- Why rest after baking?
A brief five-to-ten-minute rest helps molten cheese settle and makes slicing easier. The skillet handle remains hot after leaving the oven.